Web Portal – Student Page
Add Photos individually using the Student Page on the Web Portal (app.pbisrewards.com)
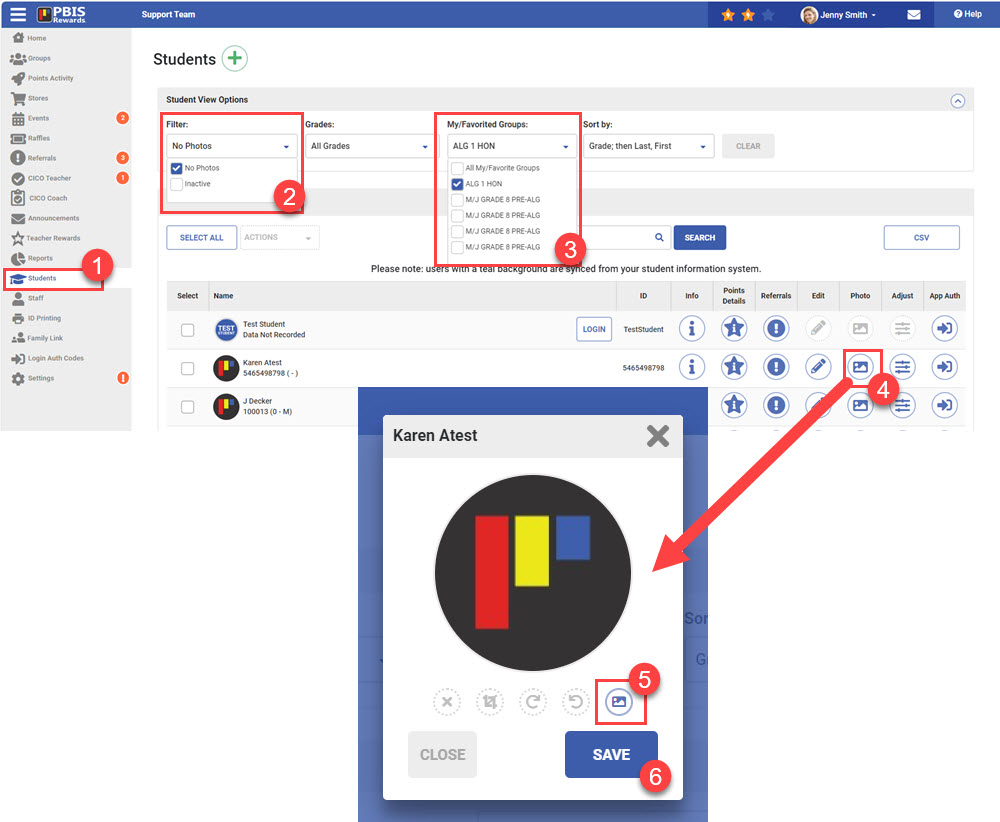
- In the Web Portal, select “Students” from the left-side “Main Menu.”
- Filters- Uses the “Filters” button to select “No Photos.” This will show all students without photos.
- Select the appropriate group from “My/Favorited Groups” to upload photos for students in a particular group.
- Select the “Photo” icon to the right column in the row for the appropriate student.
- Select the photo button to upload a new photo.
- Select “Save” after making a change.
Once you have save the photo you can go back and crop or rotate the image.

All staff members have access to add and edit photos.
Tip: A great way to add photos is to sign in to the Web Portal using an iPad (app.pbisrewards.com). Clicking the camera icon will let you use the iPad’s camera to take a photo. Use the plus to add a photo. You will be offered the option of using the camera. Select the camera icon. Take the photo and then select “Save.”This example screenshot was taken on an iPad.
This same process can be used to add staff photos. Simply start by selecting “Staff” from the left-side main menu for the first step.
Web Portal – Group
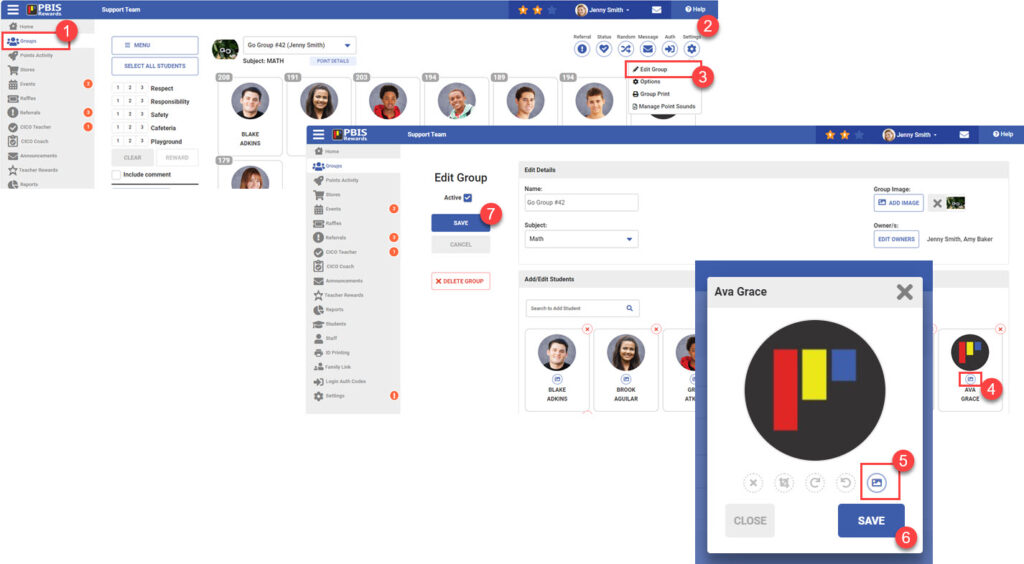
- Select “Groups” from the left-side main menu
- Choose “Settings”
- Select “Edit Group” from the drop-down
- Choose the photo icon on a student card
- Select the image button to upload a photo and select the photo from your computer
- Save the new photo
- Save the changes to the group

Staff Mobile App
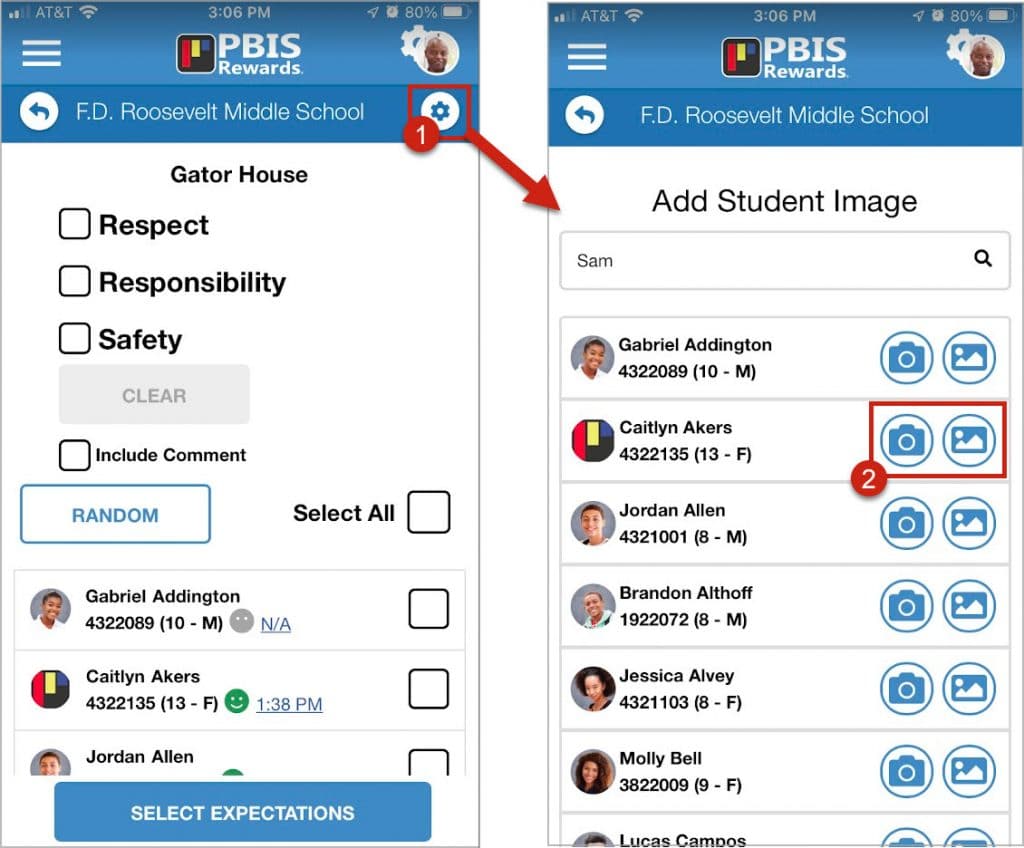
On the Staff Mobile App, select one of your groups.
- Choose the setting icon in the upper-right
- Add an image for a student by taking a picture with the “camera” icon or select a photo with the picture icon

Upload a Photo File
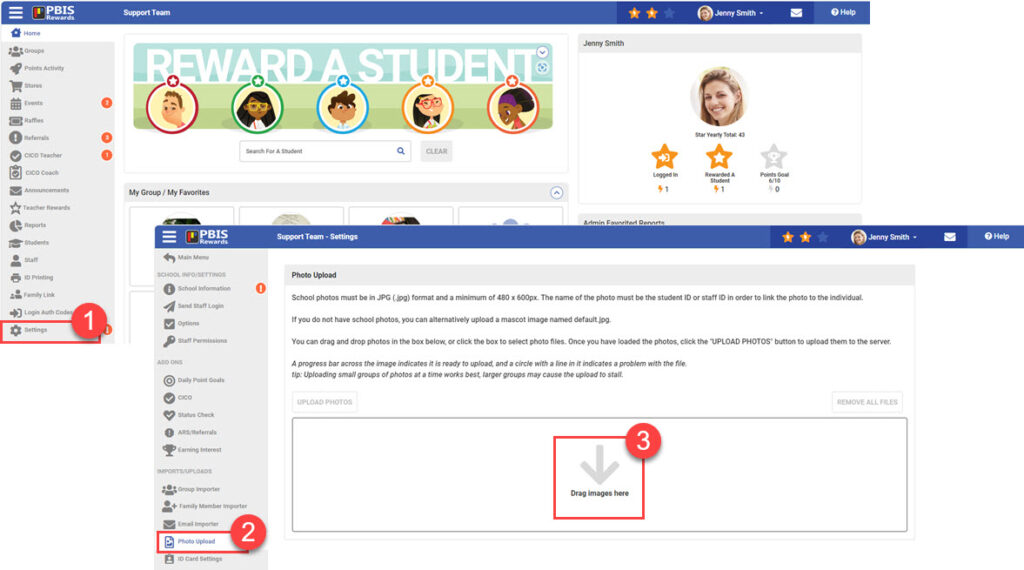
- Select “Settings” from the left-side main menu
- Choose “Photo Upload” from the next left-side menu
- Drag and drop your photo file in the field or click in the box and search for your photos
- Once the images populate, use the “Upload Photos” button to import the images


 Why are my students from last year still showing?


