 Raffle
 Event
Event
 Store
Store
Basic
The school store is a great place to have incentives that are available for the whole school.
Sell from the Web Portal
Sell items from the School Store on the Web Portal.
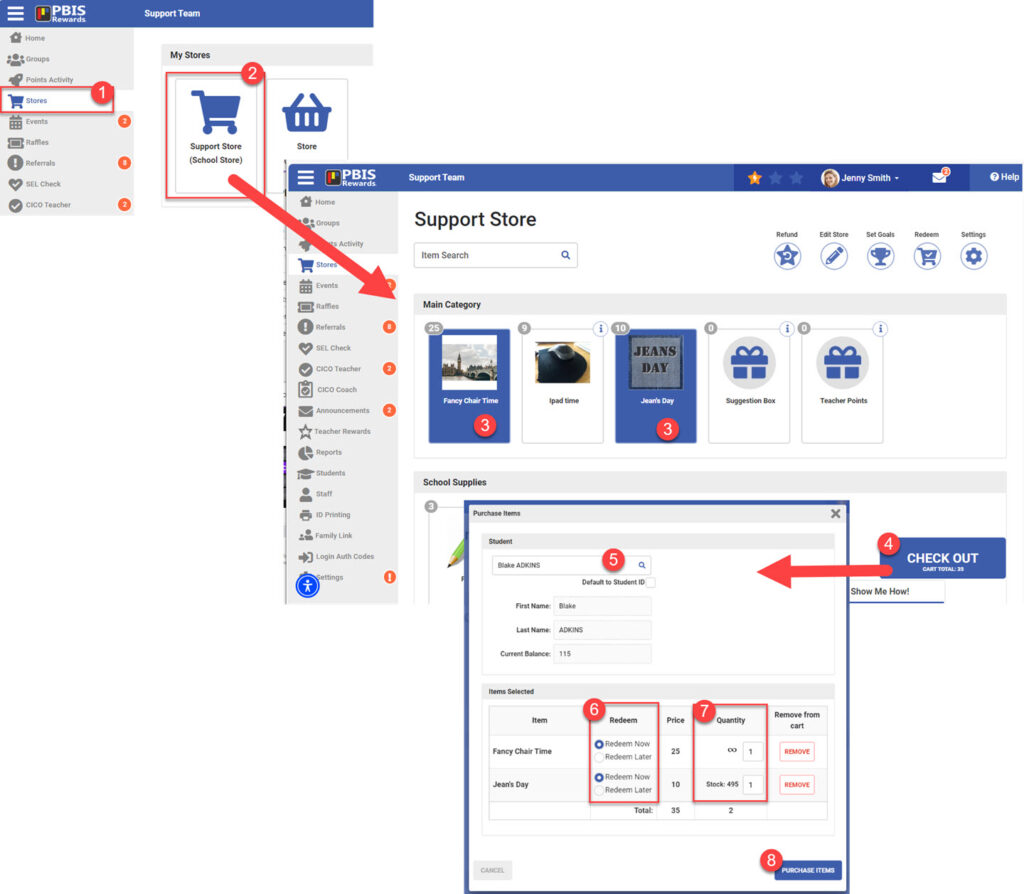
- From the left side main menu choose Stores
- Select the school or one of the available classroom stores.
- Select items to add them to the cart.
- Click Check Out.
- You will search for the student and select them. The student’s current balance will be displayed.
- Determine if the items will be Redeem Now (given at that moment) or Redeem Later (to be given at a later time).
- Adjust the quantities, if needed.
- Choose “Purchase Items” to complete the purchase.
Sell from the Group
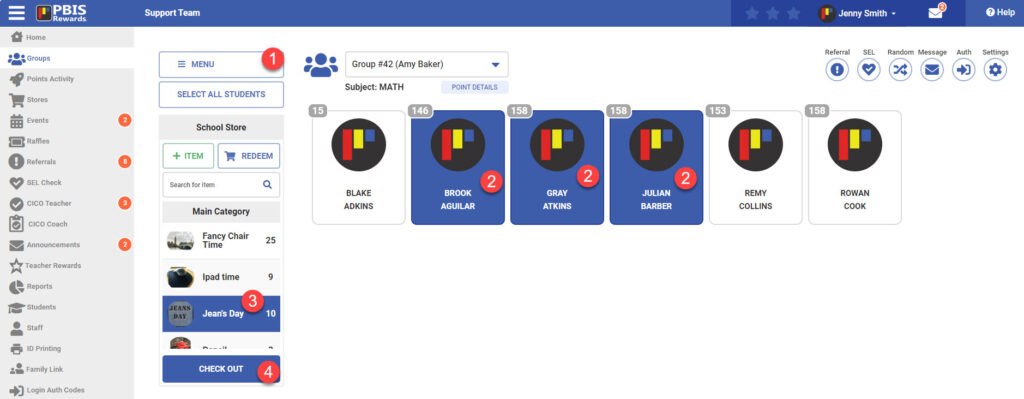
- Select the Store from the “Menu.” In the example below, 3 students are buying the “Jeans Day” from the “School Store.”
- Select the students who want to purchase an item.
- Choose the Item that the students want to purchase.
- Once the students and the item are selected, select the “Check Out” button.
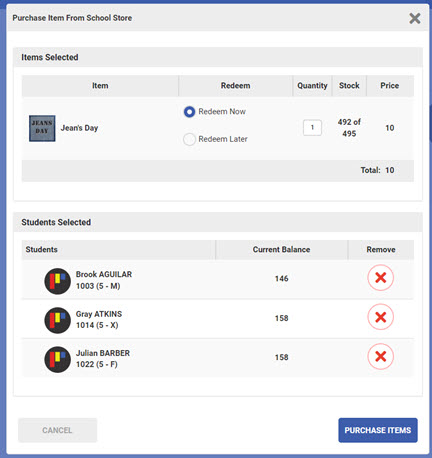
- In this confirmation screen, you have the opportunity to remove students who do not want to make the purchase using the x, adjust the quantity, and change to “Redeem Later.”
- “Redeem Later” is a feature that allows to save the purchase on the student queues on the redeem queue.
- Selecting “Purchase Items” will deduct the points from the student account balances.
Sell from the Staff App
- Choose “Expand All” to reveal all items in the “My Store” and the “School Store” categories
- Or select the down arrow in any category to reveal the items for that category only. Use “Collapse All” to hide the items again.
- Selecting the image of any item will reveal more information. You will see a larger image with the item description below the image. Select the X to close the pop-up.
- Tapping the name of any item will turn its cell blue, meaning it has been added to the cart. Select all of the items that the student desires to purchase.
- Select “Check Out” at the bottom of the screen.
- Adjust the quantity in the “Quantity” field if the student is buying more than one of an item.
- Take any unwanted items out of the cart with the orange “Remove” button.
- Leave as “Redeem Now” or select “Redeem Later.”
- The “Redeem Later” option stores the purchase like an electronic coupon. To discover if a Student has any saved rewards, choose “Redeem” from the Smartphone Staff App “Main Menu.” Scan the student QR code or search for the student to check purchases
- Search or scan to find the student. The system will check the student’s balance and return information if either of the following exists:
- You will be notified if the student has insufficient funds, but you can proceed with the purchase using the override feature (if it has been made available in your school Options). The override will use all of the points the student has available in their balance.
- You will be notified if the student has a goal. Remind the student of their goal and proceed with the purchase if appropriate.
- Select “Buy Item.” The message that follows will confirm that the item or items were purchased as well as give the student’s new balance, grading period total, and year total.
Advanced
You can customize a store specifically for your class, as well as have a school-wide store.
Customize School Store name and Points name
Set up the School Store
From your left side menu, select “Stores.”
- You will see the school store and your personal teacher store, as well as any public stores at your school.
- The School Store is a store every teacher can access and every student can purchase from. “My Store” is just for you and only students in your groups will be able to make purchases from this store.
- A Public Store is a teacher’s store made accessible to all teachers and students by the teacher who “owns” that store.
- Select Stores
- Select School Store
- Select the “Edit Store” button at the top right

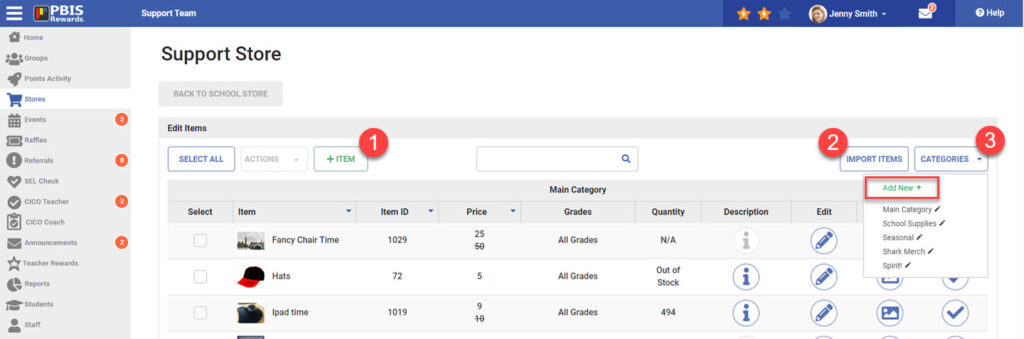
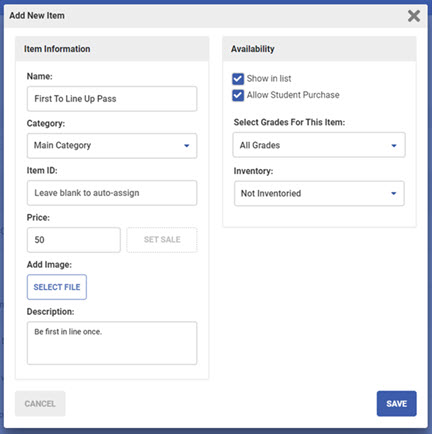
- You will be able to add items individually
2. Import using a formatted spreadsheet. To import items, you will be able to download a template and create a list of your items. Once this file is saved as a CSV, click “Select File” to import your items.

3. You can create categories for items in the store. This allows for easy organization for both staff and students! To do this, click “Manage Categories” then “Add New.”
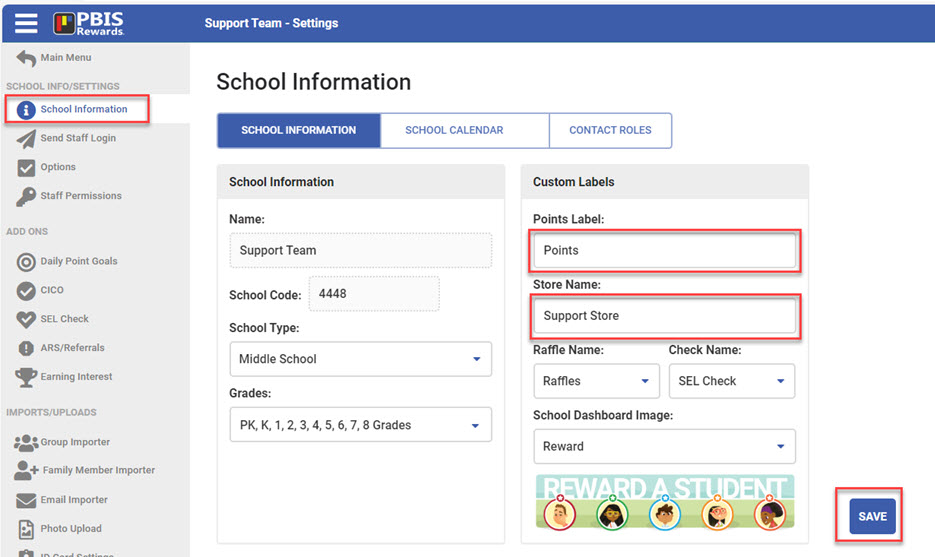
Customize School Store Name and Points Name
Customize the name of your school store and the name of your points too! Choose “Settings” from the left-side Main Menu.
In “School Information,” fill in the name of your school store in the “Store Name” field. Fill in the name of your points in the “Points Label” field. Select “Save” in the bottom right-hand side.