 Admin Setup – House Groups
House Groups can be created and edited to provide more flexibility for the school to implement their house system.
Importing House Groups
Admin can use the group import to create all of their house groups so that they have complete control over which students are in each house.
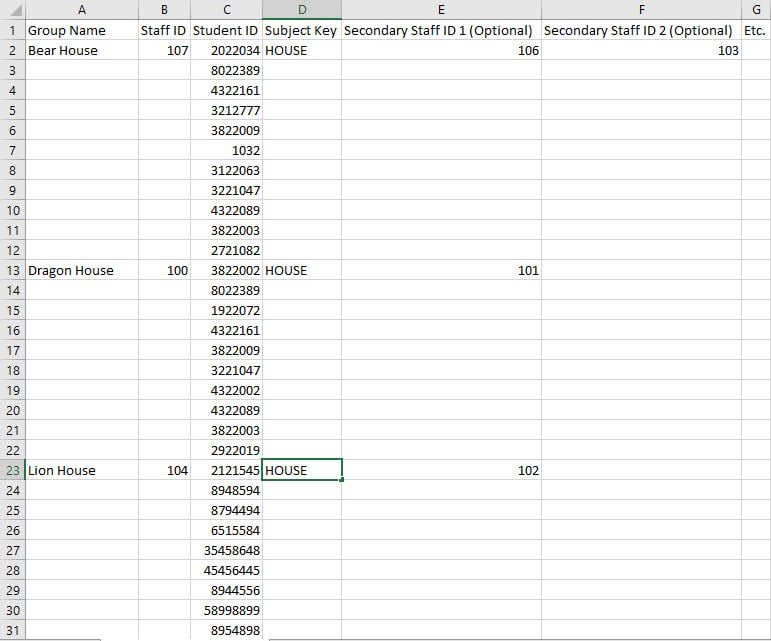
First you will need to create a CSV file that will be used to create your house groups (see image). A file template can be downloaded from the Settings page under the Group Importer tab. The file should include the following: the house group name, the Staff ID in charge of the house, the student ID numbers that will be in the house, the subject key of “HOUSE” displayed and any additional staff IDs that will be associated with the house group. NOTE: additional staff or students can be added to a house group at any time.
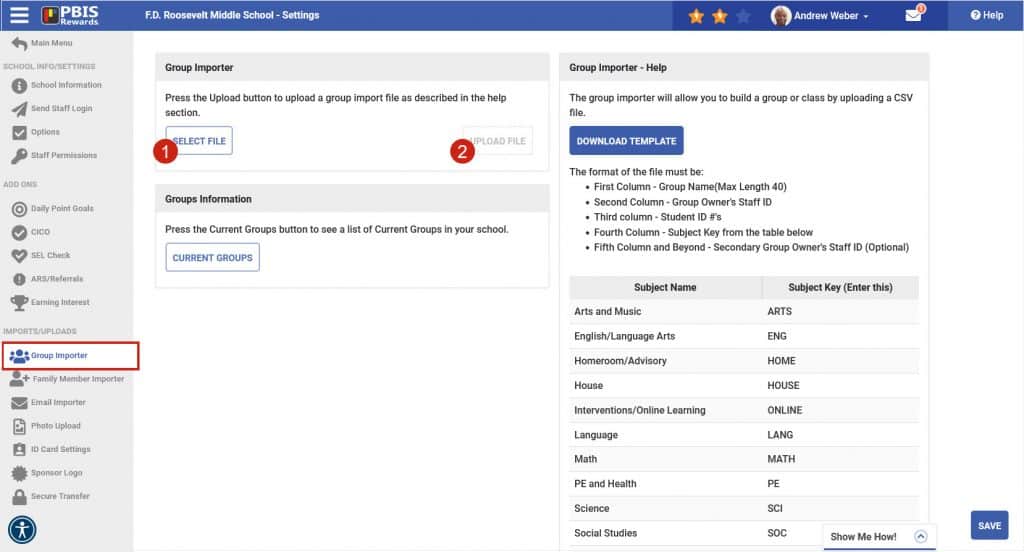
Once your CSV is ready you can to go the Group Importer tab on the Settings page, press the “Select File” button and choose the “Upload File” button to import all of your house groups.
Create Groups and Auto Assigning Students
If house group assignment are something that your school would like to be randomly assigned then you can follow the steps below to create and populate your house groups.
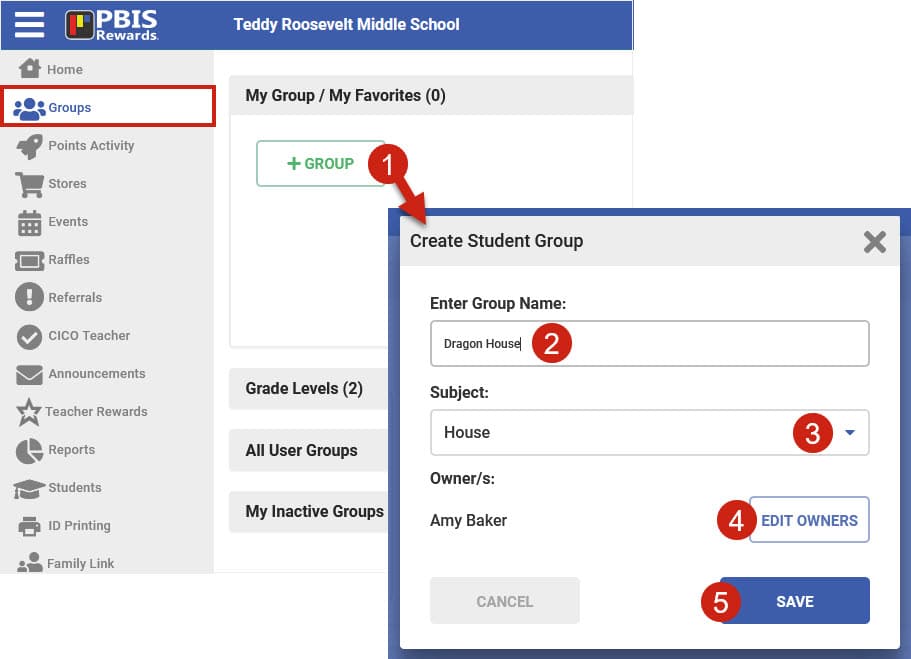
- Create each of the Houses that you will be using in your school by going to the Groups page and selecting the “+Group” button to add an additional group. Choose the name of the group and select “House” from the subject dropdown, include any other staff that you would like to be owners of the group and save the group.
2. When all of your houses have been create you can go to the House Group Assignment reports in the Tools tab of the Reports menu. Once you have opened the House Group Assignments report, choose “Unassigned” from the dropdown menu, click the “Generate” button and then press the “Assign” button to auto assign all of your students into the different houses that you have created.

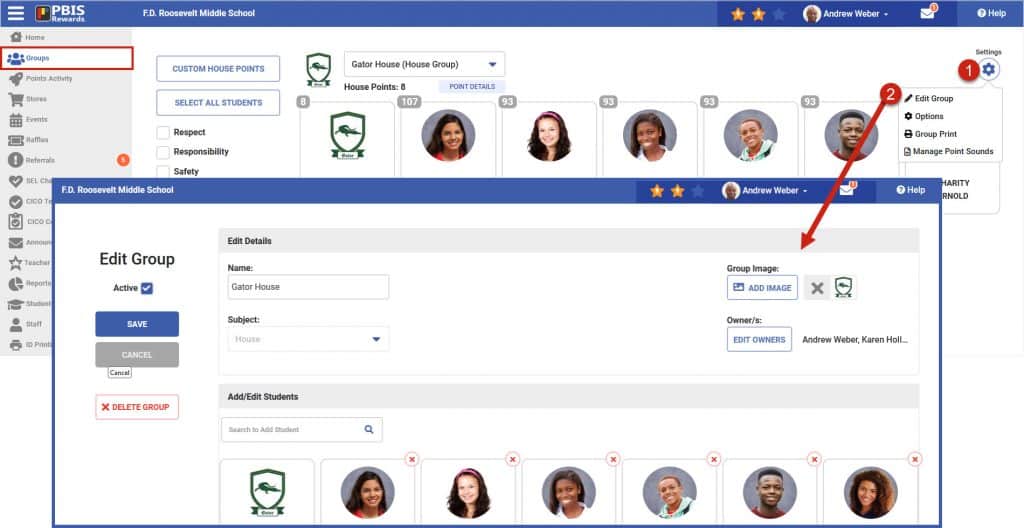
Editing House Groups
House groups can be edited at any time by an admin or house group owner. Students and staff can be added or removed from a house group and a House image can be added to distinguish it from the other house groups. To edit a house group, select the group from the home screen or groups tab and then select the “Settings” icon in the upper right corner then choose “Edit Group” from the dropdown menu.