 Student/Family Resources
Student Connection Options
There are several easy and convenient options for students to access their PBIS Rewards accounts. A PBIS Rewards admin at your school can select the option that will work best for your school and students.
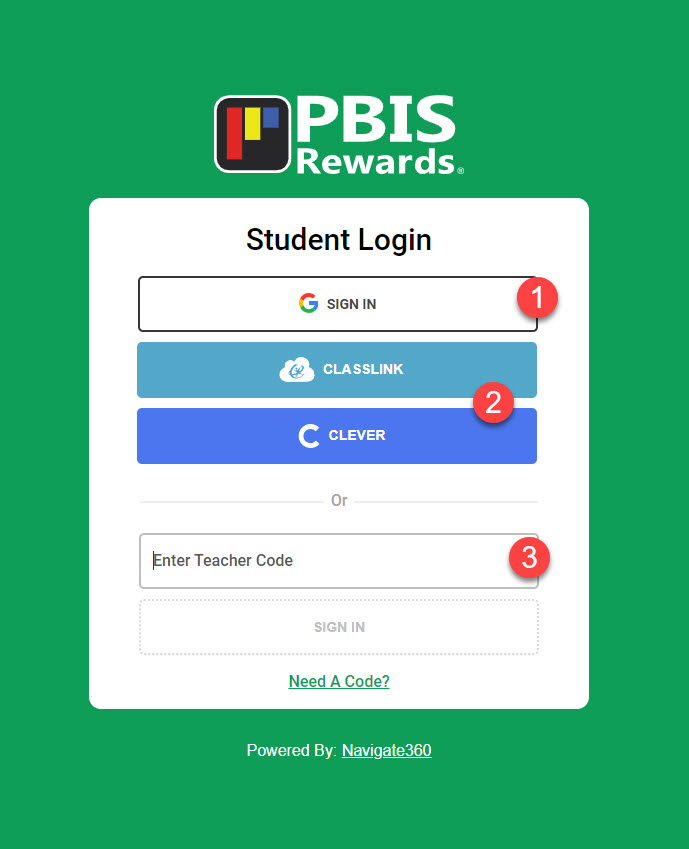
1. To use Google SSO, the student will go to student.pbisrewards.com and select “G Sign In.” If the student is not signed in to Google yet, they will be prompted to sign in. This feature is used on a Chrome browser or Chromebook. On the Student App, the student will select “Google” (student google emails must be added to the system for this option).
2. The students will use the Clever or ClassLink button if one of those Single Sign-On options has been set up by your tech services.
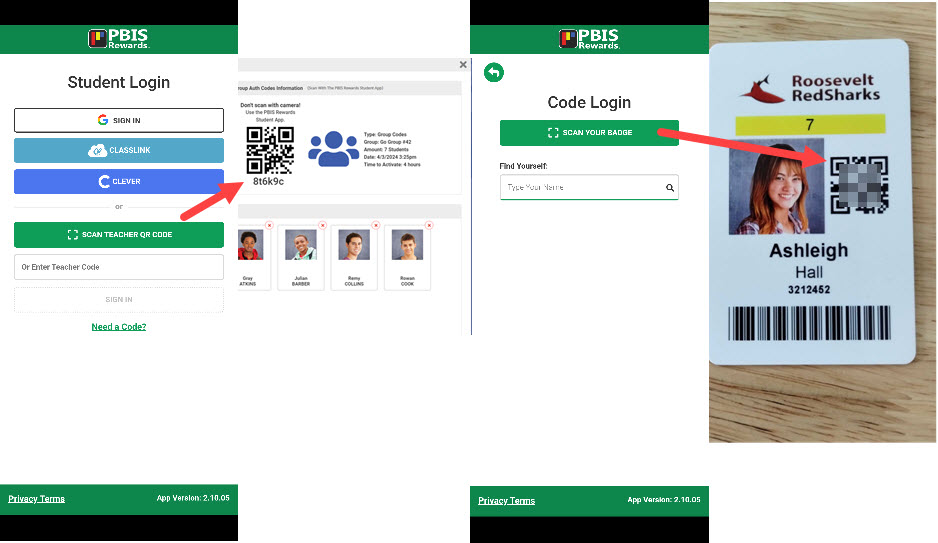
3. To log in with an Auth Code using the web portal, students will go to student.pbisrewards.com on their computers. They will get a code from their teacher. They will enter it in the field labeled “Enter Teacher Code.” If it is a group code, the student will search, and select. If students have the option to stay signed in and want to, they will check the “Remember Me” check box. Use the PDF resources provided at the bottom of this page to show students how to log is to the Student Portal with an auth code.
Before students will be able to access PBIS Rewards, they must be listed in Student screen. Admins can view and add students to PBIS Rewards.
PBIS Rewards Student App
To log in to the Student App with the Auth Code, students will download the PBIS Rewards Student App and log in using a code or a QR given to them by a staff member. A quick way to do this is via a group code or from the app by generating a student code. The video above will demonstrate creating the code from a group.
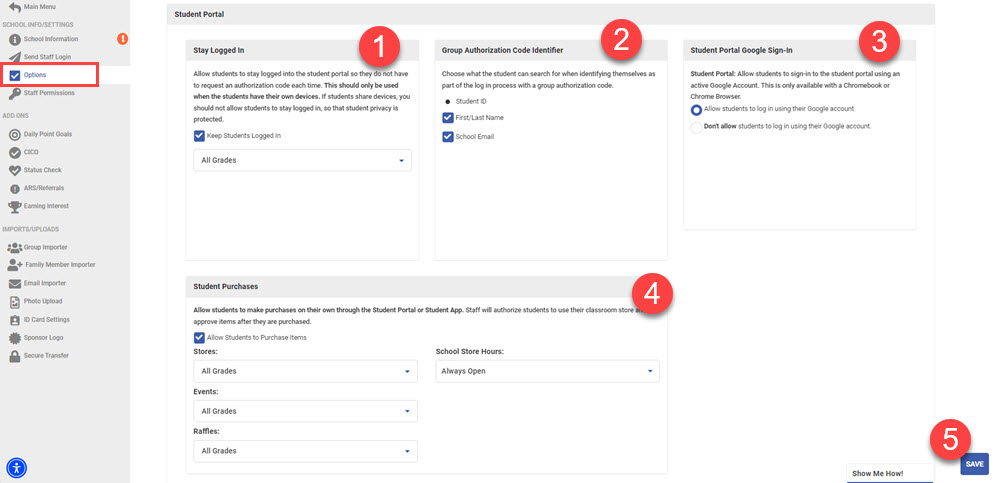
Student Access Settings
An admin can select how students access the Student Portal and Student App. In the Web Portal, select “Settings” and then “Options.”
Note: If your school will be using Clever or Classlink, contact your tech services to have Clever SSO or Classlink SSO turned on.
On the Options screen, scroll down to the section named “Student Portal.” Use these options to control how student access will work.
- Select if students will have the “Remember Me” option on the Student App and Student Portal.
- Determine if the students will search for their name, ID, or email address when they are given a Group Auth Code or QR code.
- For Google SSO, turn on the feature by selecting “Allow students to log in using their Google Accounts.” Gmail addresses will need to be included in the student information on the student screen.
- To upload Gmail accounts, select “Settings” and then “Email Importer.” Instructions on how to create the CSV file are on that page.
- Determine if the students can make their own purchases in the Store, Raffles, and Events. Set School Store hours, if desired.
- Select “Save” after making selections.